Work Orders
Work orders are the core of your workflow as a service provider. Each work order represents a task assigned to you — an inspection, repair, preventive maintenance job, or emergency fix. You receive work orders from property managers and progress them through a defined lifecycle until completion.
Key concepts
Work Order
A work order is an actionable piece of work created by a property manager to resolve a maintenance request or as a planned maintenance activity. Each work order has a type, deadline, checklist, attachments, and a description of the work required.
Work orders are assigned to you as an external partner. You are responsible for confirming, executing, and completing the work.
Work Order Types
Each work order has a type that indicates the nature of the work:
- Inspection — Routine check of equipment or systems
- Testing — Functional testing or commissioning verification
- Periodic — Scheduled recurring maintenance
- Conditional — Maintenance triggered by condition monitoring
- Corrective — Fixing a known issue or defect
- Repair — Restoring broken equipment to working condition
- Emergency — Urgent work requiring immediate response
- Warranty — Work covered under manufacturer or service warranty
Work order lifecycle
Every work order progresses through a defined set of states:
Work order lifecycle
- New — The work order has been created and assigned to you. Review the details and confirm it.
- Confirmed — You have acknowledged the work order and set a planned execution date.
- In Progress — You are actively working on the task.
- Done — You have completed the work and submitted a resolution summary.
After you mark a work order as done, the property manager reviews and closes it. You may also see work orders in Closed or Canceled states — these are read-only and cannot be modified.
Viewing your work orders
Open work orders appear on your dashboard, filtered to show only active states (new, confirmed, in progress, and done). Tap any work order to open its detail view.
Each work order in the list shows its number, name, and current state.
Work order details
When you open a work order, you see a detailed view with the following information:
- Description — What needs to be done, optionally with an audio recording
- Type — The work order type (inspection, repair, emergency, etc.)
- Deadline — When the work must be completed
- Planned Work — The date and time you plan to execute the work (editable)
- Created — When the work order was created and by whom
- Site — Which property the work order belongs to
Checklist
Work orders may include a checklist of specific steps or items to complete. Check off each item as you work through the task. The checklist is saved automatically.
Attachments
View photos, documents, and other files attached to the work order by the property manager. These help you understand the scope of work and locate the issue.
Messages
The messages tab lets you communicate with the property manager about the work order. Use it to ask questions, provide updates, or share additional context.
Confirming a work order
When you receive a new work order:
- Open the work order from your dashboard
- Review the description, checklist, and attachments
- Select Confirmed from the state menu
- A dialog appears asking you to set the planned execution date and time
- Select the date and time you plan to carry out the work
- Confirm the dialog
The work order moves to the Confirmed state and the planned execution date is visible to the property manager.
You can also update the planned execution date at any time by editing the Planned Work field in the task summary, without changing the state.
Starting work
When you begin working on a confirmed work order:
- Open the work order
- Select In Progress from the state menu
The work order moves to the In Progress state immediately — no additional input is required.
Any activity on a New work order — adding a part, sending a message, uploading a photo, or editing details — automatically moves it to In Progress, so the property manager can see that work has started.
Recording parts used
If the site uses Spare Parts Management, a Parts used section appears in the work order. Record every part you consume during the work — filters, belts, batteries, consumables — with quantity and unit cost.
Tap Record part used (also available directly in the state menu) to open the wizard:
- Install to — pick the technical system the part is installed to, or Consumable for material not tied to any system — cleaning supplies, oil, tape
- Install or replace — when the system already has installed parts, choose between installing a new part and replacing an existing unit (shown with age and lifetime status); with nothing to replace this step is skipped
- Details — select the part, then enter quantity and unit cost; for installed parts you can also record the expected lifetime and per-unit serial numbers, typed or scanned straight off the sticker
When selecting a part, search by name, code, or manufacturer — or scan its EAN barcode with your device camera. If the part doesn't exist in the catalog yet, you can create it on the spot. You can also open the part's details to see its photo and attached documentation, such as replacement instructions.
Planned part replacements
Some work orders arrive with part lines already on them, marked Planned — verify in red: the platform planned these replacements because the parts reach their expected lifetime around this visit. They are a plan, not a record — verify each one on site:
- Tick the line's checkbox and choose Mark as replaced if you swapped the part as planned — or open the line to record the new unit's serial number and cost, which verifies it too.
- Choose Not replaced — remove if the part didn't need replacing after all.
The work order cannot be marked Done or closed while planned lines are still unverified.
When the property manager closes the work order, installation-tracked parts you recorded are automatically added to the technical system's installed parts, and the units they replaced are marked removed — your entries build the system's replacement history.
Completing a work order
When you have finished the work:
- Open the work order
- Select Done from the state menu
- A dialog appears asking you to provide a resolution summary
- Describe what was done, what was found, and any follow-up actions needed
- Confirm the dialog
The work order moves to the Done state. The property manager will review your resolution and close the work order.
Linked technical systems
If the property has technical systems enabled, you may see a Systems tab in the work order detail view. This shows the building equipment linked to the work order — for example, the specific HVAC unit, elevator, or fire panel you are servicing.
Tap a technical system to open its full detail view.
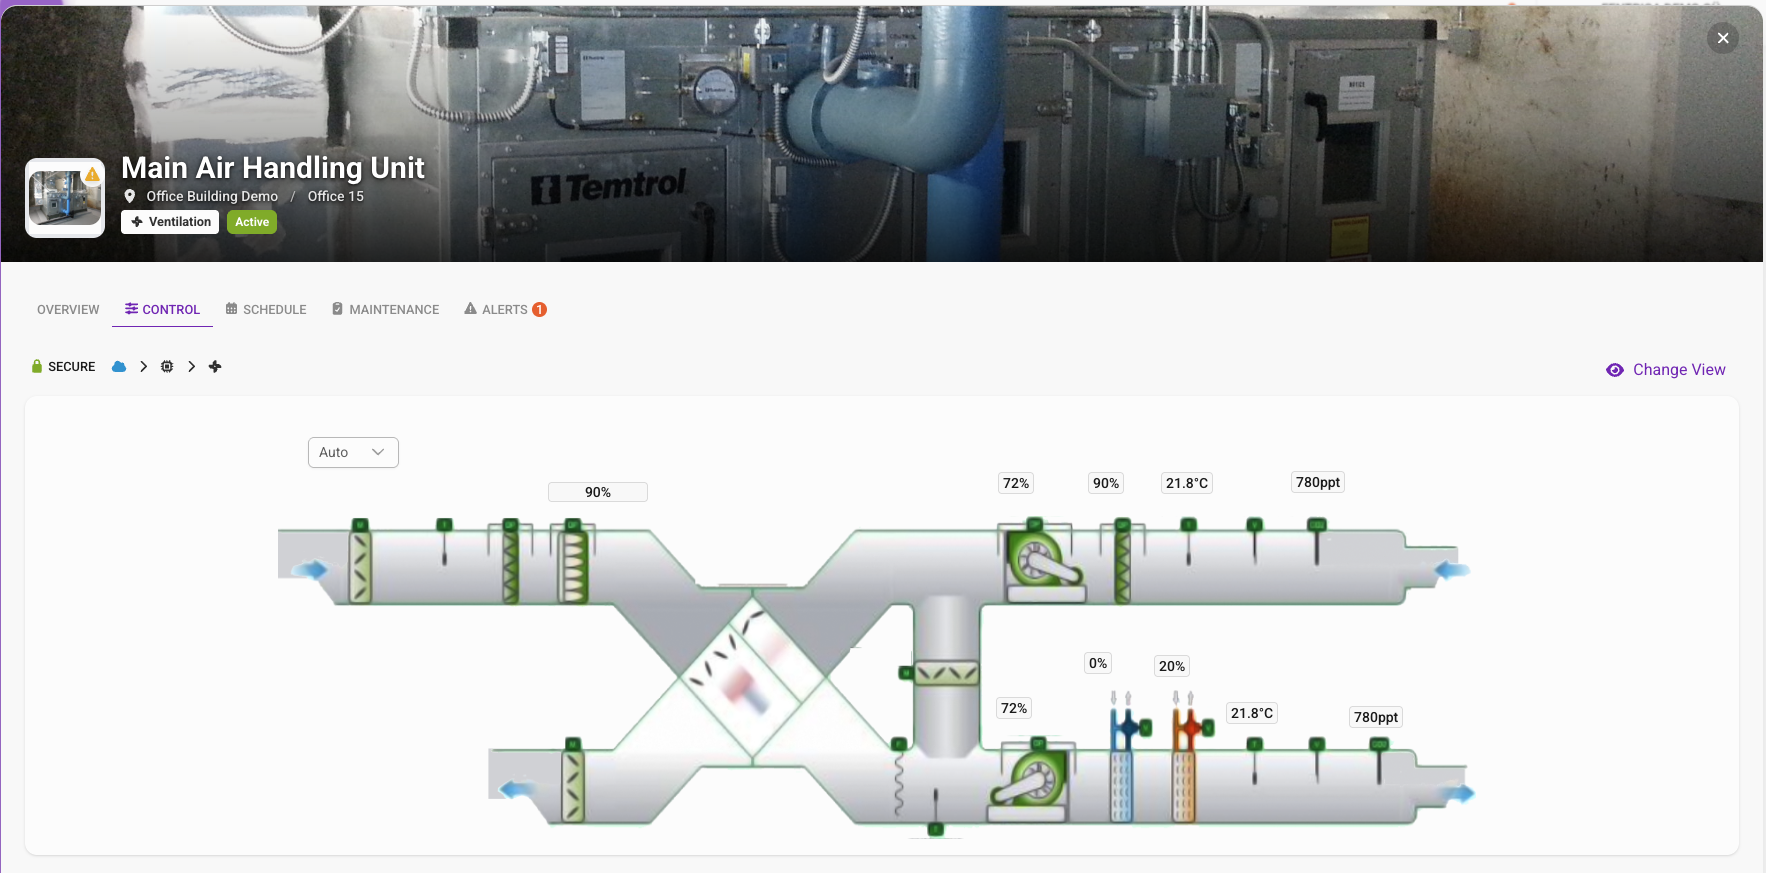
Technical system view
When you open a linked technical system, you see a detailed view of that piece of equipment with everything you need to diagnose, service, and document the work.
- Overview — The system's identity and current state: manufacturer, model, serial number, commissioning date, expected lifespan, and time remaining. Also highlights open maintenance tasks with deadlines and active alarms with severity, source, and duration.
- Control — Real-time view of the system. View live data points and current setpoints directly from the platform.
- Schedule — AI-powered and rule-based energy optimization schedules managed by Fentrica. Shows when and how the system operates, including setpoint adjustments.
- Maintenance — Maintenance journal, service history, and O&M (Operations & Maintenance) documentation for the system. Tracks all past and planned maintenance activities in one place.
- Parts — The spare parts currently installed in the system, each with its installation date, serial number, and lifetime progress toward its replace-by date. Parts you record on work orders end up here automatically.
- Alerts — Alarm history and active alarms for the system, including faults, errors, and warnings. Each alarm entry shows severity, source, timestamp, and resolution status.
Alarms
Alarms are generated when a system or sensor crosses a configured threshold or enters an abnormal state. Each alarm has a priority level and a lifecycle state.
Alarm priority levels:
| Priority | Severity | Meaning |
|---|---|---|
| Fault | Critical | A serious failure requiring immediate attention |
| Error | High | A malfunction that affects system operation |
| Warning | Low | An anomaly that should be monitored |
Alarm lifecycle:
Alarm lifecycle
- Active — the alarm condition is ongoing
- Resolved — the condition has cleared but the alarm has not been acknowledged
- Cleared — the alarm has been reviewed and closed
AI Alarm Analyzer
When an alarm occurs, the AI analyzer examines the alarm details, system context, and historical patterns to provide an explanation of what likely caused the issue and how to resolve it. The AI also uses uploaded technical documentation, user manuals, and O&M materials to provide more precise and contextual insights.
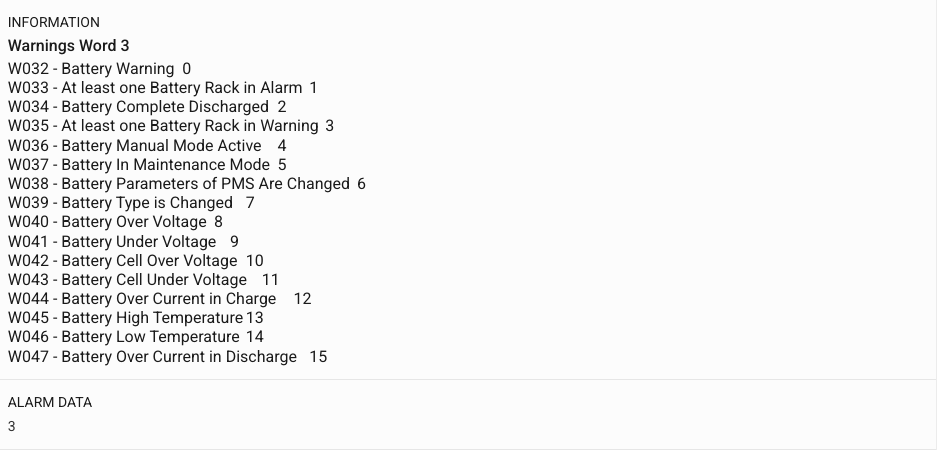
Alarm details
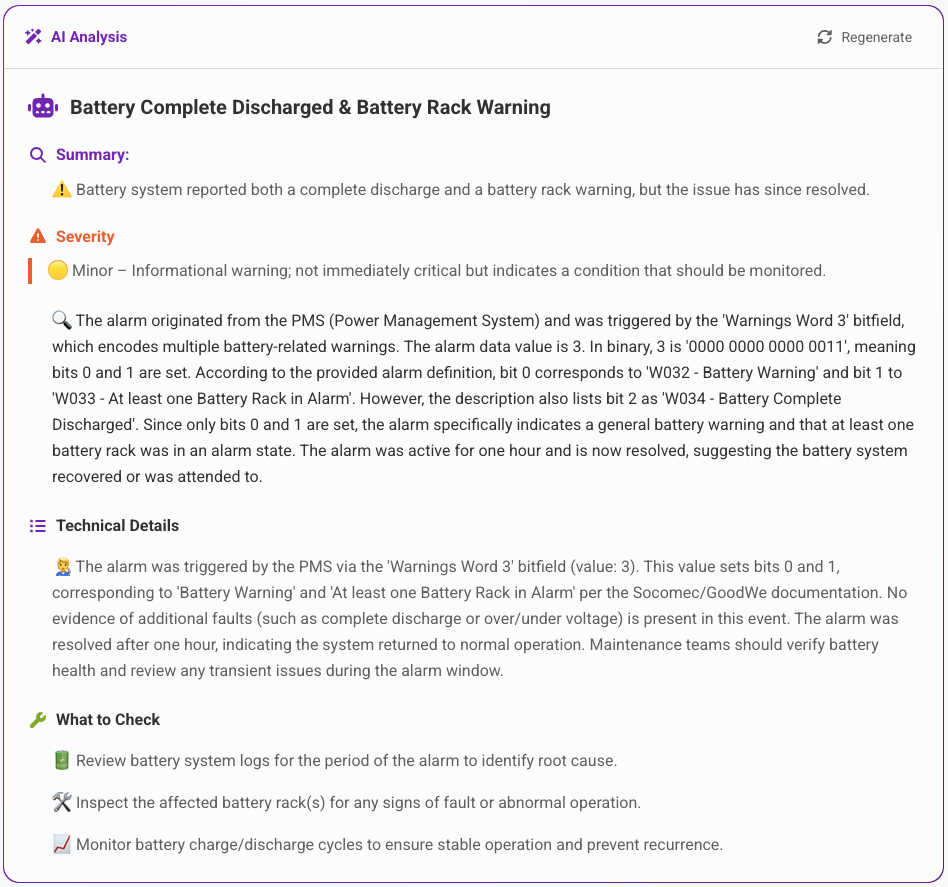
AI analysis
Linked smart spaces
If the property has smart spaces enabled, you may see a Smart Spaces tab in the work order detail view. This shows the IoT-enabled spaces related to the work order.
Tap a smart space to open its detail view showing available controls and current sensor readings.
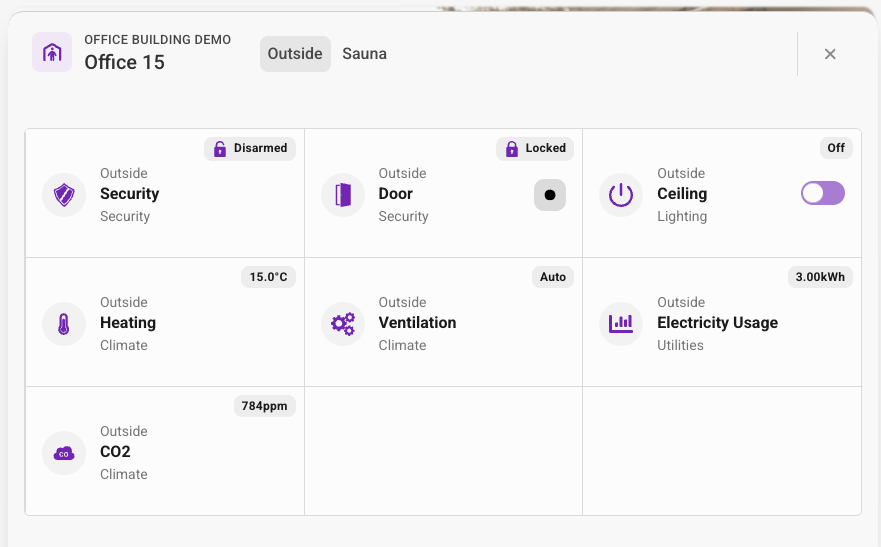
The available controls depend on the devices installed in the space:
- Climate — View or set target temperature, heating/cooling mode
- Lighting — Turn lights on/off, adjust brightness
- Ventilation — Adjust fan speed or air flow
- Doors / Access — Lock or unlock doors, view access status
- Security Systems — Arm or disarm alarm zones, view camera feeds and system state
- Sensors — View current temperature, humidity, CO₂ levels, and other readings
- You can only interact with spaces linked to your work order
- Changes may be overridden by building automation schedules set by the property manager
- Some controls may be read-only depending on the building configuration